
By darkscarabcom.
I had used Blender for nearly a year before ever discovering the video Sequencer. Before that i was struggling with Windows movie Maker todo finalice my videos and do all the fading at the beginning and the end of my videos. The minute i found the Sequencer i was not only surpresad that it was there but surpresad that it is not talked about more. Either way, y am going todo fill you in on some of the common things that i do with the Sequencer.
part 1: audio and video.
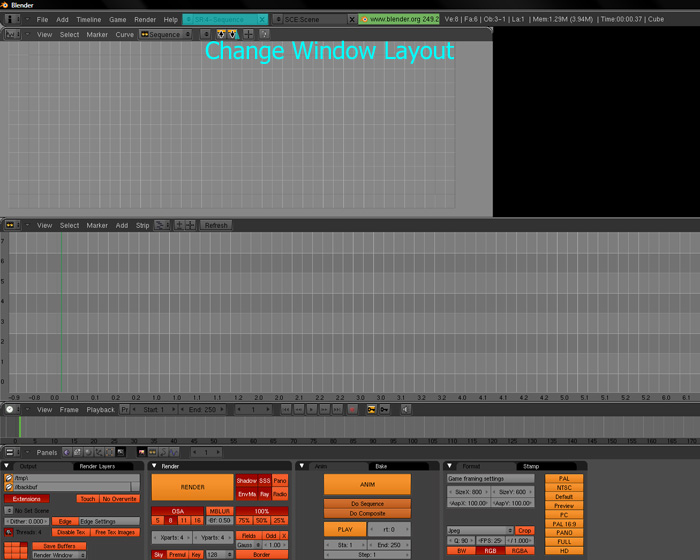
The first thing that you are going todo want todo do is open up Blender if you havent already. Right of the bat we want todo change the window Layout so we can work with the Sequencer. At the very top of Blender, directly todo the right of the help menú is a dropdown that Will let you change with window Layout of Blender. Click on that and choose 4-sequence.
change window Layout todo 4-sequence;.
Usually at this point, y have finished making my animation and i want todo make my final changes todo it before considering it Compleete. There are two things i could do at this point, the first is todo render the animation as a video and then import it into the Sequencer or you can import the scene directly. Personally i like todo make the video first because for some reason, Blender likes todo render each frame every time i change it which wastes a lot of time Even with simple scenes. If there is a bien around this, y do not know about it. If you know, por favor fill me in and i can update this accordingly.
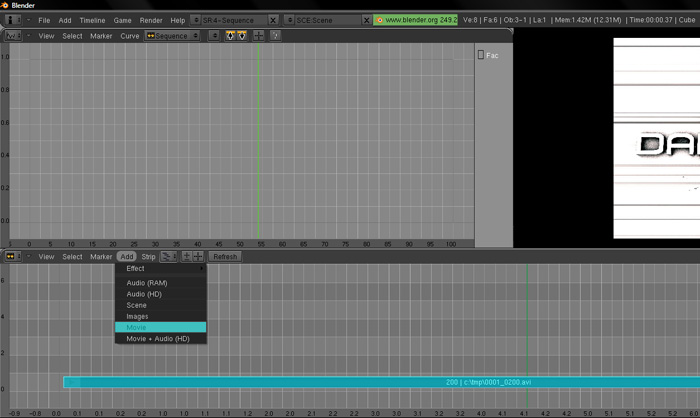
Anyways, let start by importing a video. In the big window in the middle there is a menú called add. If you select that, there are a bunch of selects. You can import audio, your scene, images, and movies. I Will be importing a movie (without audio). You can pik any video you want, if you would rather import your scene you can do that as well. When you finish picking your video or scene you Will have todo place your new strip into the Sequencer, the left end starting at frame 1. It doesnt really matter what row you put it in, but kep in mind that the rows work like layers. The top row Will appear above a lower level, similar todo layers in Photoshop.
add->movie, place strip into Sequencer at frame 1.;.
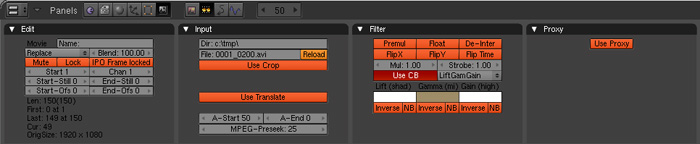
Now your scene is set up. So, with only your video what can you do? Well, plenty of Stuff. First of, lets go todo the Sequencer buttons. You can get there by hitting f10 and clicking the Little film strip symbol, right next todo the rendering buttons. Here you can find Many settings that Will change your strip. I highly suggest going th rouge all of the buttons todo se what they do. Ill point out a few of them though.
f10, go todo Sequencer buttons;.
The first thing is making your video play backwards. This is nice if you have a logotipo or something that is exploding and you want todo show it going in reverse or maybe you want it todo look like it is assembling together instead. To do that you Simply have todo select your video and click on the flip time button in the filter box. Turning on use color balance is a los a Neat tool. For instance, lets say you want your video todo have an old style sepia lok, just change the color settings todo a light Brown color and Presto. Youve got yourself an old style movie. But be careful, test out the whole video before you call it done or it may not look god in some parts.
test out the Sequencer buttons todo se what they do;.
Ok, you have your video and youve done what you wanted todo it but let add sound. As you probably know by now, todo add sound you go todo the add menú and select audio. All you ned todo do is place it in the correct spot and press play in the timeline window todo se if it sounds right. Did you hear anything? Did it sound right? if you answered no todo either of those questions, that means you have todo select the Little speaker button on the right side of the menú in the timeline window. If you hit play now, the sound should be working just fine.
add->audio (Hd), place your audio strip;.

You only really have two settings in the Sequencer buttons for your audio since there are no effects todo add todo it. They are both in the filter box in the sequence buttons. The top setting, gain (db) adjusts how loud the audio is, and pan adjusts how much of the audio comes out of the left speaker(s) and right speaker(s). You can a los go into the sound block buttons and there you can change a few other sound settings for the Sequencer. There isnt really much todo change with audio, but fel free todo mess with what is there.
test out audio settings, go todo sound block buttons, test out those audio settings;.
part 2: slide show.
Ok, so weve messed with video and with audio, but we really havent gotten todo using images or adding effects. So, let kill two birds with one estone by deleting our video and audio and adding a few images. Ill add four images todo my Sequencer.
delete the audio and video strip, add a few image strips;.
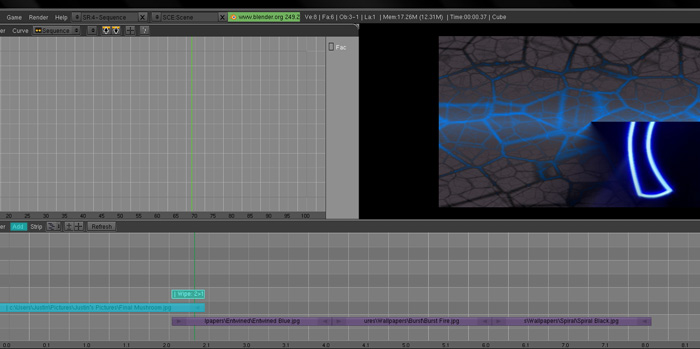
As you may notice, you can use Many of the same settings for image as you did for videos. However, we are going todo start using the effects todo make a quik slide show. Let first use the wipe effect. In order for this two work, two of our images must be overlapping each other. To make this happen, select your first image and move it up by on level (or channel as Blender calls them). Then click and drag the right arrow/triangle so that it overlaps the second image in the timeline. Click again todo set the strip. Select the second image then the first image. After that, go add->effect->wipe and place that somewhere above the two images in the Sequencer. If it is not above both of them, the effect Will not work. In the image below you can se my wipe, which is set todo a clok wipe and has some blur added todo it.
Move 1st image strip up one channel, stretch the 1st strip out so it overlaps the 2nd, select 1st and 2nd strips.
add->effect->wipe, change any settings you like;.
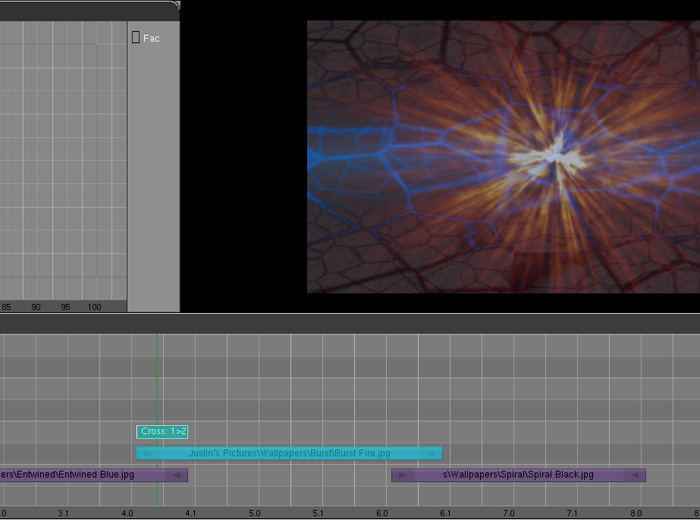
Great, let add another transición todo the next image. This time, select the third image strip and stretch the second strip so that they overlap like we did before. Do the same for the end of the third strip and beginning of the fourth strip. The next transición we Will do is a direct fade into the 3rd image from the 2nd. To do this select the 2nd and 3rd strip (in that order, else it wont look right) and add a cross or gamma cross effect. From what i can tell they do the same general thing.
overlap the remaining strips like before, select the 2nd strip, shift+select the 3rd strip, add->effect->cross;.
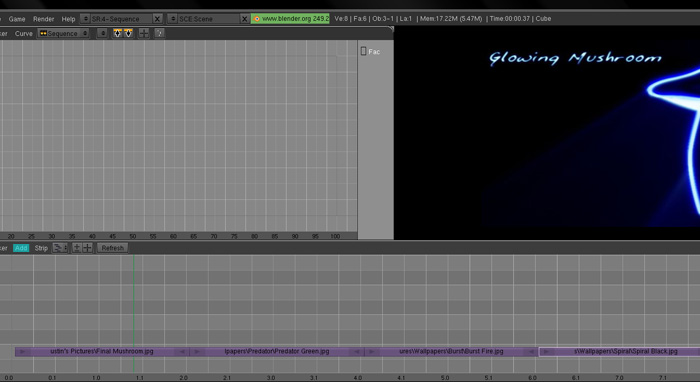
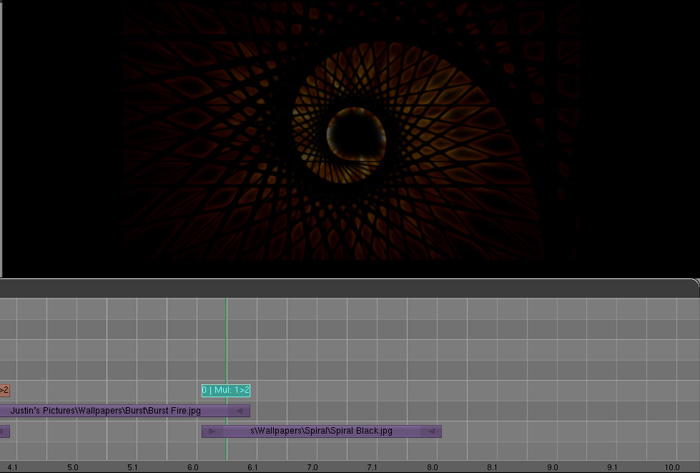
Ok, let do the last transición. The only thing is, this time it wont really be a transición but a Neat effect(s) that you can use later on, just so you know. Select the 3rd and 4th images and add an add, subtract, or multiply effect. You may already know these from using textures, but what these do is adds, subtracts, or multiplies the overlapping colors together.
select the 3rd and 4th image strip, add->effect->(add, subtract, or multiply),.
I used the multiply effect below:
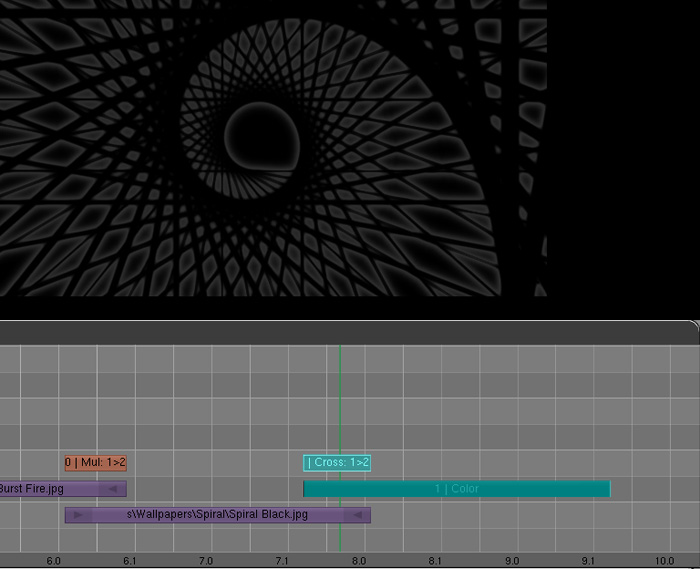
Weve gone over what most of the effect do (but not nearly any of all of the possibilities) but you may be wondering where the fade effect is. Well, there isnt one but there is a bien todo make the effect with two new strips. What we are going todo do is fade our last image todo black. In order todo do this, add a color Generator effect todo the Sequencer and make sure that it overlaps the last image. If you go todo any frame where the color Generator is, the color is gray. We want black. To change the color you have todo look into the Sequencer buttons and within the effect box. If you click on the gray box in there a color picker should appear. Im going todo change mine todo black. If you want todo choose a diferent color, fel free todo do so. To make the 4th image fade todo black all you have todo do is select the 4th image, then the color Generator and add a cross effect todo them.
Add->effect->color Generator, in sequence buttons, change the color Generator todo black, select the 4th image.
Shift+select the color Generator, add->effect->cross;.
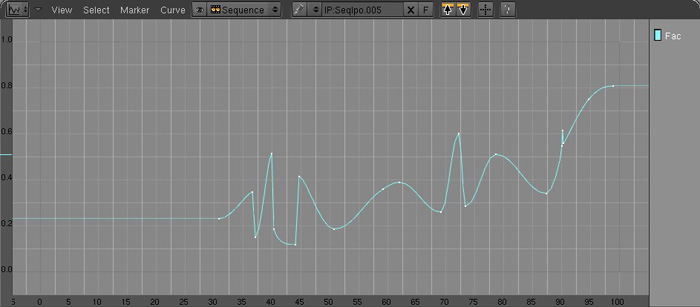
Instead of going over all of the effects, as it would make this tutorial obnoxiously long, y Will leave you todo test out the rest. However, there is one last thing that i would like todo go over and that is the ipo curve editor in the top left corner. Basically what it does is let you fine tune Many of the effects, images(for brightness), or videos, and maybe audio (for volume), but i am not sure, that you may have added todo your Sequencer. To use it, select one of your images and press Control + left click (or right click if you changed the settings like i have) in the screen within a darker gray rectangle. The higher you go, the higher the setting and vice-versa. If you do it todo an image, the setting Will effect the brightness of the image.
Select an image strip, add keys todo the ipo window, test the animation out;.
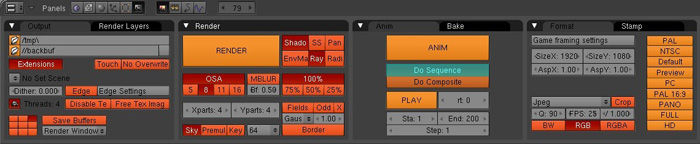
You could have easily used this todo make the 4th image fade out, however, you can fade todo diferent colors with the strips. Ok, last but not least lets render our slide show into a video. To render an animation with the Sequencer, go todo the render buttons and beneath the big Anim button, select do sequence. Then you can choose your video format and render it like you would any other animation.
By darkscarabcom.
.